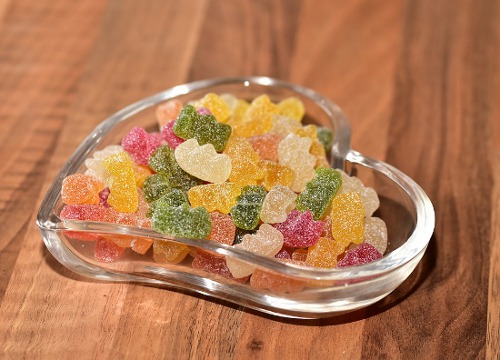
Jellies are utterly delicious and our taste buds go crazy at their sight. How many of us have not cried to get them from our parents as a kid?
Buying jellies from food stores is one thing and cooking them at home is something different. Homemade jellies expose us to a new world of challenges and self-satisfaction.
But, wait a minute!
Is making jellies at home really challenging? I don’t think so. Similar to any other hobby, learning to make jellies will take time. But once you get the hang of it and learn how to use bulk jelly supplies, there’s nothing more fun than it. Who knows? You might launch your own brand of jellies someday!


In this guide, I will tell you about the basics of jelly making, and then elaborate on what things need to be taken care of in the entire process. If you stay tuned with me till the end, you will learn how to experiment with different flavors of homemade jellies.
Let’s begin!
Basics of Homemade Jellies
What is Jelly?
Jelly can be made by extracting fruit juice and cooking it with pectin and sugar to thicken it to a firm, but spreadable consistency. It’s commonly used with whole fruits having seeds in them or skins, like grapes, cranberries, and raspberries.
Homemade jelly will tend to have a complex flavor, which you may not find in the generic jars at grocery stores.
Which 3 Ingredients Do You Need to Make Homemade Jelly?
- Fruit: If you’re making jelly for the first time, use high pectin, high acid type of fruits. Examples are crabapples, cranberries, tart apples, gooseberries, lemons, concord grapes, blackberries, and currants. The high pectin content ensures a smooth and proper gel.
2. Sugar: Sugar works in conjunction with pectin and fruit acids to form the gel texture in jelly. Remember that using less sugar than required can keep your jelly from settling well, and adding too much can result in stiff jelly.
3. Pectin: It is the most important ingredient in making homemade fruit jelly. Pectin creates the gelling effect that you want. The fruit has natural pectin but if you’re using low pectin fruit (like fresh strawberries), you can supplement it with a high-pectin ingredient like fresh lemon juice.
Use a candy thermometer while cooking and make sure to reach a 220°F setting point otherwise you might end up with runny jelly. To make a low-sugar jelly, you’ll increase the amount of pectin used.
What Type of Equipment Do You Need to Make Jelly?
- Jelly jars: Heat-proof sealable glass pint jars are recommended for storing jam after cooking. When using the canning method, the jam should be hot when it goes inside its sterilized jar. Otherwise, it can become moldy.
- A large, heavy-bottomed saucepan: A heavy pan protects the fruit from overheating and provides a larger surface for evaporation. The key to making jelly is reducing water in the fruit and helping it to thicken with the sugar.
- Heatproof spatula or wooden spoon: Such utensils don’t quickly heat to high temperatures or chemically react with acidic foods. Thus, they are suitable for jelly making.
- Jelly bag: This is not totally necessary but it makes the task of straining your pieces of fruit for juice much easier. It will leave behind a clarified liquid perfect for jelly making. If you cannot find such a bag, feel free to use a cheesecloth.
Quick Tips for Making and Storing Perfect Homemade Jelly
Use fresh fruit and avoid the frozen fruit juice. Always buy in-season farmers’ market fruit without damages or dents. Overippened or spoiled fruit will ruin the flavor and lifespan of your jelly.
Prefer to cook your fruit in a stainless steel, copper pot or bulk food storage containers. Metals like aluminum or cast iron have a tendency to react with the acid in the fruit and will infuse a metallic taste in your preserves.
Storing Homemade Jelly
Your jelly should be cooled and stored in clean, sterilized jars. Depending on how good your storage techniques are, the jelly might last up to a month in the refrigerator or even up to a year in the freezer.
The shelf life of jelly also depends on the sugar content. Sugar is not only used as a sweetener but also as a preservative. It helps to maintain the color of your fruit and prevents mold development. Alternatively, if you process the food product by canning it in a boiling water bath, the shelf life can go up to two years.
Try These Flavor Combinations for Homemade Jelly
- Red pepper jelly: Combine 1 ½ pound red bell peppers (deseeded and finely chopped into 2 ½ cups), 1 tablespoon unsalted butter, 2 teaspoons red pepper flakes, 1 cup white wine vinegar, 3 ¼ cups sugar, and 1/2 teaspoon salt. Boil, reduce to a simmer and stir occasionally for 5 minutes to soften. Add 3 tablespoons dry pectin, boil, and continue stirring for another 1-2 minutes until thickened.
- Cranberry jelly: Combine 4 cups of cranberry juice with 6 cups of sugar. Boil it while stirring constantly. Stir in 4 tablespoons of dry pectin and boil for another minute. Keep stirring until the mixture thickens.
- Raspberry jelly: Combine 5 1/2 pounds fresh berries (strained into 3 1/2 cups juice), 2 ½ cups sugar, ½ cup of water, and ½ cup lemon juice. Boil the mixture and then reduce it to low heat. Simmer the liquid for 8-12 minutes, until thickened, while stirring constantly. No need to add the pectin because raspberry has high pectin content.
There you go! You have experimented with three flavors of homemade jelly. You can use these combinations in your own recipes.
Final Thoughts
Wasn’t it easy to make homemade jelly? You just went through the basics of jelly making and explored three flavors. Before you start making it next time, jot down the recipe on a piece of paper for easy reference. You can order bulk food coloring products if making jellies frequently. Your family and guests will definitely be delighted with your jelly making skills. Go ahead and love what you do!


